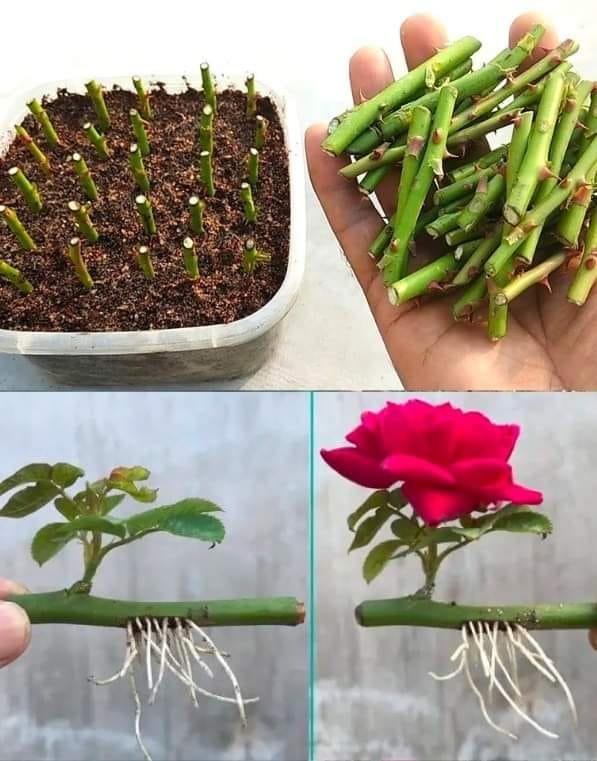
Learn how to Propagating Roses successfully. Discover various methods, tips and tricks for growing new rose plants from cuttings, layering and more.
Propagating roses is a rewarding way to expand your garden or share your favorite roses with friends. This guide will walk you through different methods of rose propagation, helping you create beautiful new plants from existing ones.
Why Propagate Roses?

Propagating roses allows you to:
- Create exact copies of your favorite roses
- Save money on buying new plants
- Preserve rare or sentimental varieties
- Enjoy the satisfaction of growing your own plants
Methods of Rose Propagation
There are several ways to propagate roses:
- Stem Cuttings
- Layering
- Grafting
- Division
- Seeds (though this method doesn’t produce exact copies)
Let’s explore each method in detail.
1. Propagating Roses from Stem Cuttings
This is one of the most popular methods for home gardeners.
Steps for Stem Cutting Propagation:
- Choose a healthy stem with several leaves
- Cut a 6-8 inch piece at a 45-degree angle
- Remove lower leaves, keeping 2-3 sets at the top
- Dip the cut end in rooting hormone
- Plant in a well-draining potting mix
- Keep soil moist and place in indirect light
Learn more about propagating roses from cuttings
2. Layering Method
This method involves encouraging roots to form on a stem while it’s still attached to the parent plant.
Steps for Layering:
- Choose a flexible, low-growing stem
- Make a small wound on the underside of the stem
- Bend the stem to the ground and cover the wounded area with soil
- Secure with a wire or stone
- Keep the soil moist
- Once roots form (in several weeks), cut the new plant from the parent
3. Grafting Roses
Grafting is more complex but allows you to combine desirable qualities of different roses.
Basic Grafting Steps:
- Choose a compatible rootstock and scion (the part you want to propagate)
- Make a clean cut on both the rootstock and scion
- Join the two pieces ensuring the cambium layers touch
- Secure with grafting tape
- Protect the graft union until it heals
Detailed guide on rose grafting techniques
4. Division
This method works well for shrub roses that form clumps.
Steps for Division:
- Dig up the entire plant in early spring or fall
- Separate the plant into sections, each with roots and stems
- Replant the divisions immediately
- Water thoroughly
5. Growing Roses from Seeds
While not guaranteed to produce plants identical to the parent, this can be an interesting experiment.
Steps for Seed Propagation:
- Collect rose hips in fall after they’ve turned red
- Extract seeds and clean them
- Stratify seeds in the refrigerator for 6-10 weeks
- Plant in a seed-starting mix
- Keep soil moist and warm until germination
Best Time to Propagate Roses
- Stem cuttings: Late spring to early summer
- Layering: Spring or early summer
- Grafting: Late winter or early spring
- Division: Early spring or fall
- Seeds: Collect in fall, plant in spring
Common Problems in Rose Propagation
- Fungal diseases: Use sterile tools and well-draining soil
- Failure to root: Ensure proper humidity and use rooting hormone
- Winter damage: Protect young plants during their first winter
Troubleshooting rose propagation issues
Caring for Newly Propagated Roses
- Watering: Keep soil consistently moist but not waterlogged
- Light: Provide bright, indirect light until established
- Fertilizer: Start fertilizing lightly once new growth appears
- Pruning: Pinch back growing tips to encourage bushiness
Propagating roses can be a fun and rewarding process for any gardener. Whether you choose to use stem cuttings, layering, or more advanced methods like grafting, with patience and care, you can create beautiful new rose plants. Remember that success may not come immediately, so don’t be discouraged if your first attempts don’t work out. Keep practicing, and soon you’ll be filling your garden with roses propagated by your own hand.