Taking care of orchids, whether they are the common Phalaenopsis, the elegant Cattleya, or even a rare one like the Thelymitra jonesii, can be worrisome when you see their leaves looking droopy and wrinkled. But if you notice this issue with your orchids, don’t worry; you’re not the only one. When orchids have limp and wrinkled leaves, it’s like nature’s way of telling us that something is wrong. It’s our job to understand this signal and fix the problem.
Fixing Wrinkled Orchid Leaves:
Orchid Distress Signals

Orchids are known for bringing a peaceful and calming vibe to wherever they’re placed. But these beautiful plants don’t always speak up when something’s wrong; they tend to give subtle hints. It’s up to us to understand their silent language and take action when they’re not feeling well.
When your orchid’s leaves start to droop and wrinkle, it’s like it’s sending out a distress call. This could happen for various reasons, like too much water, not enough water, big temperature changes, using the wrong kind of soil, or even a disease called rot. Each of these problems needs a careful look and the right solution to fix it.
Check out Growing Hostas from Seed: A omprehensive Guide Click here…
Root Causes of Wrinkled Orchid Leaves

Orchids are very delicate plants, and they don’t grow or change quickly. That’s because they have a slow metabolism, so everything happens at a slow pace. This is why it’s crucial to keep a close eye on them and take action as soon as you notice signs of stress. Usually, this stress shows up as the leaves getting soft and eventually drooping..
There are several potential culprits behind your orchid’s limp and withered leaves:
Overwatering
Overwatering is the leading cause of orchid demise among houseplants. Excessive moisture around the roots hinders oxygen absorption and moisture uptake, resulting in the dreaded drooping leaves.
Underwatering
When an orchid’s leaves become limp, withered, and dry, it’s often a cry for water. These tropical plants require a consistent supply of warmth and moisture for their well-being.
Excessive Heat
While orchids appreciate warmth, excessive heat can cause their leaves to wilt, serving as a temperature distress signal.
Cold
Cold temperatures can also lead to limp leaves, among other symptoms. It’s vital to recognize these signs and take appropriate action.
Wrong Growing Medium
An unsuitable or aged growing medium can cause your orchid’s leaves to lose turgidity.
Root, Crown, and Leaf Rot
These are severe problems that can manifest in limp leaves, often stemming from overwatering. Caution in watering is of the essence.
Unraveling Overwatering

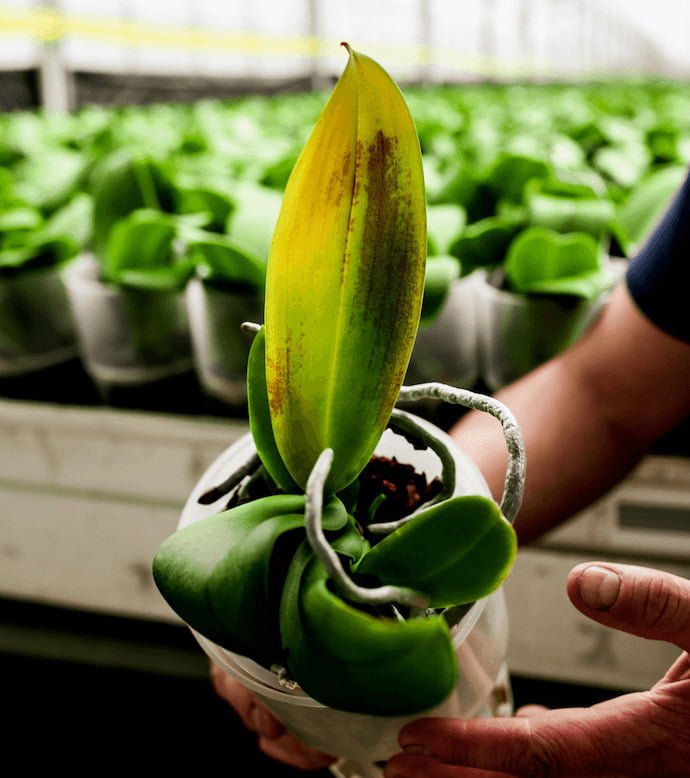
The most common reason for orchids having droopy or wrinkled leaves is overwatering. It might sound strange, but too much water makes the roots too wet, and this stops the plant from getting enough oxygen and moisture. This is what causes the leaves to become limp.
To diagnose overwatering, first, scrutinize the leaves:
- Loss of turgidity
- Wrinkles on the leaves
- Diminished luster
- Sideways curling and lengthwise drooping
In extreme cases, overwatering can result in leaf tissue deterioration, culminating in color changes, typically a transition from green to yellow.
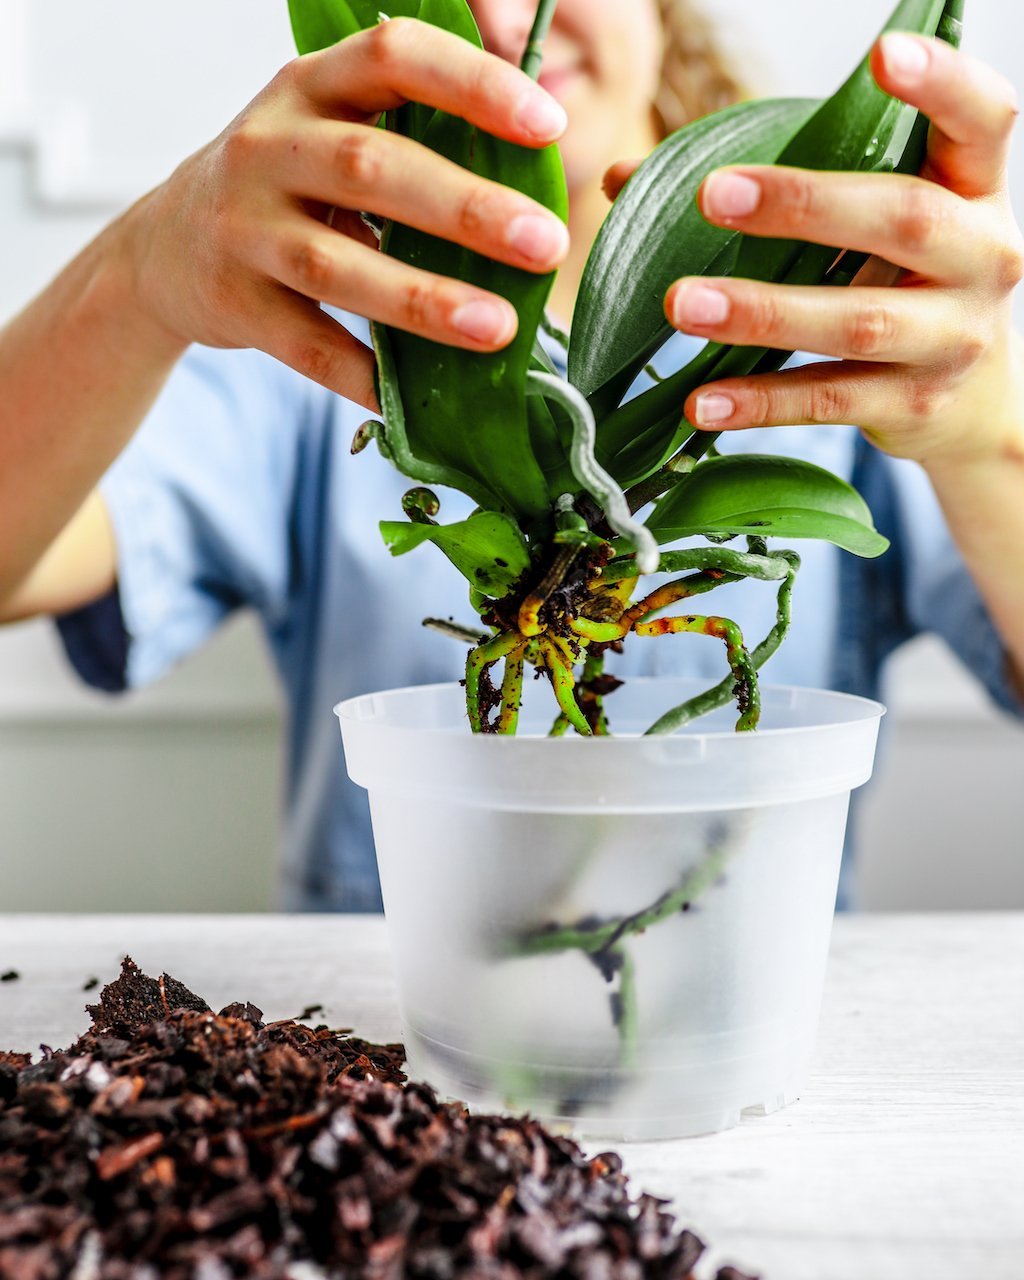
To discern the roots’ condition, gently remove the orchid from its pot, extracting the growing medium to inspect for signs of root rot:
- Rotten, yellow, or brown roots
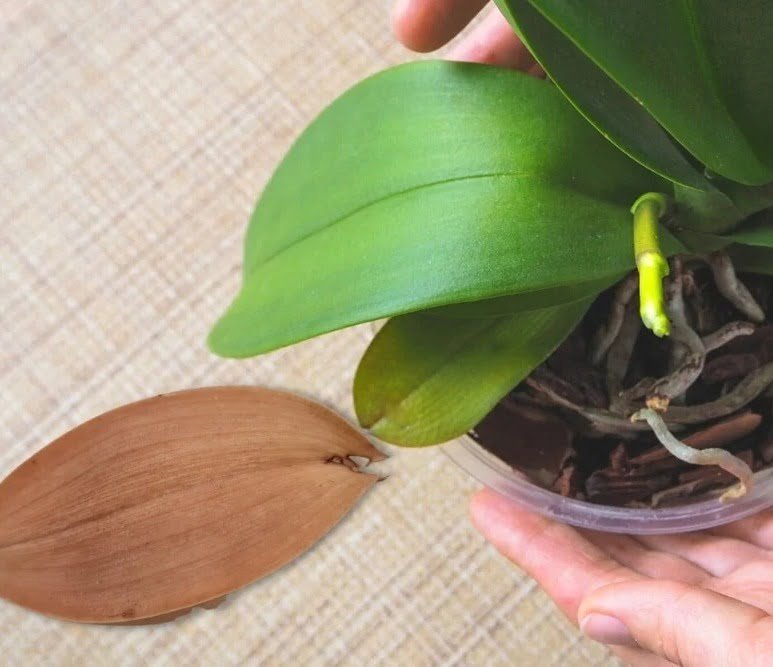
- Examination under the crown, the point where new leaves emerge
- Presence of an old stem under the crown, which signifies a cutting from an older orchid
- Assessment of the growing medium for moisture levels, avoiding soft, soggy, or friable textures
If no severe rotting is observed, only some root softening and discoloration, and no issues with the growing medium, it’s likely a case of straightforward overwatering. If more complex issues are present, further guidance follows.
Remedying Overwatering
- Clean the Roots: Gently remove all the old soil without harming the roots.
- Check the Roots: Surprisingly, watering the roots a bit can help you spot the healthy ones, which will turn bright green. Unhealthy ones look yellow or brown.
- Trim the Roots: Use a sharp and clean blade to neatly trim any diseased roots. Make sure your cuts are good.
- Remove Root Ball: If you see a clump of roots, it’s often a part of the overwatering problem. Take it out carefully.
- Dealing with Old Stems: If the old stems have rot, cut them and put organic sulfur powder to stop the infection from spreading. Leave them alone if they are healthy and hard.
- Let Them Dry: Leave the roots to air dry for a few days before you repot the orchid. Don’t water it right away.
Blooming Orchids and Overwatering
If your orchid is blooming and it’s not doing well, what you should do depends on how bad the problem is. If the flowers look sad, and the stem is turning yellow and weak, it might be a good idea to cut the stem. It might seem tough, but this can help the plant focus on getting its leaves healthy again.
When you cut the stem, be sure to use sharp and clean scissors and make a neat slanted cut. The exact spot to cut can vary, but for Phalaenopsis orchids, it’s often a good idea to cut about half an inch above a spot where a bud is starting to grow. Pay attention to how your orchid reacts to decide the best way to help it.
Signs of Recovery from Overwatering
Getting your orchid back to health after overwatering takes time, especially because orchids have a slow metabolism. Even though the leaves might not completely recover, you can watch for these signs of improvement:
- Increased leaf firmness
- Gradual restoration of leaf shine
- Possible color correction, transitioning from yellow back to green
Overwatering and Rot
Too much water often causes problems like rot. We talked about how to deal with overwatering when it’s not too serious in the previous section. But when there’s rot in the roots, crown, or leaves, it’s a more serious situation. We’ll go into this in more detail later in the article after we’ve covered how to fix other common issues with orchids.
Addressing Underwatering
When orchid leaves droop, become limp, and display signs of wrinkling, it signifies a dearth of water reaching these leaves. This can result from substrate dryness or root system diseases that impede water transportation.
To begin, it’s essential to understand that inadequate water supply not only impedes leaf hydration but also hampers nutrient absorption, as water is a pivotal factor in the process.
Identifying Underwatering
- Dry patches or edges on the leaves
- Browning of the leaves, sometimes forming vein-like patterns or patches
- Yellowing, starting at the tips of the leaves
- The presence of dry tissue
Remedying Mild Underwatering
If you detect only slight root dryness and minimal signs of underwatering, follow these steps:
- Soak the Orchid: Put your plant in dechlorinated water at room temperature for about 20 minutes. If you have rainwater, that’s a great option. Make sure all the water drains out before you put it back in its saucer.
- Boost Humidity: If you want to make the air more humid for your orchid, don’t let the roots touch the standing water directly. Instead, use a bigger saucer under the pot’s saucer to create a buffer for humidity.
Addressing Severe Underwatering
If your orchid exhibits extensive root dryness and significant signs of thirst, follow these steps:
- Check Your Orchid: Gently take your orchid out of its pot and look at the roots. If the soil is old or not good, change it.
- Dry Roots: After you wet the roots, make sure to get rid of all the old soil. Look at the root ball and see if it’s healthy. If needed, cut the roots and use organic sulfur powder to clean them.
- Tea Time: Get a bowl of room-temperature water without chlorine for soaking. Put a black tea bag in the water and let it sit for 5 minutes. The tannins in the tea can help the roots grow and make your plant better.
- Soak It: Put your orchid in the water for about 15 minutes. Make sure all the water drains out before you put it back in its saucer.
Orchids in Bloom
If your blooming orchids are thirsty due to not getting enough water, you can use the same methods as you would for overwatered orchids. Depending on how your orchid is doing, you might notice the existing flowers perk up or even the chance for new side stems to grow.
Signs of Recovery from Underwatering

Recovery from underwatering is typically faster than that from overwatering, but patience remains key. Watch for these signs of improvement:
- Restoration of leaf shine
- Leaf plumpness and improved turgidity
To help your orchids with droopy and wrinkled leaves, you need to watch them closely and do the right things. Overwatering and underwatering are common problems, but you should also think about other issues like too much heat, cold, bad soil, and rot. As you get better at understanding your orchids and fixing their issues, you can make them healthy again and appreciate their beauty. Building a good relationship with your orchids is important for their health and happiness.
Pingback: https://gardenersschool.com/orchid-leaves-wrink...
Pingback: Philodendron Mayoi Care Guide Gardeners Schools
Pingback: World of Orchids: From Name Meanings to Captivating Facts
Pingback: How To Fix Wrinkled Orchid Leaves: A Simple Guide - Activegaliano.org